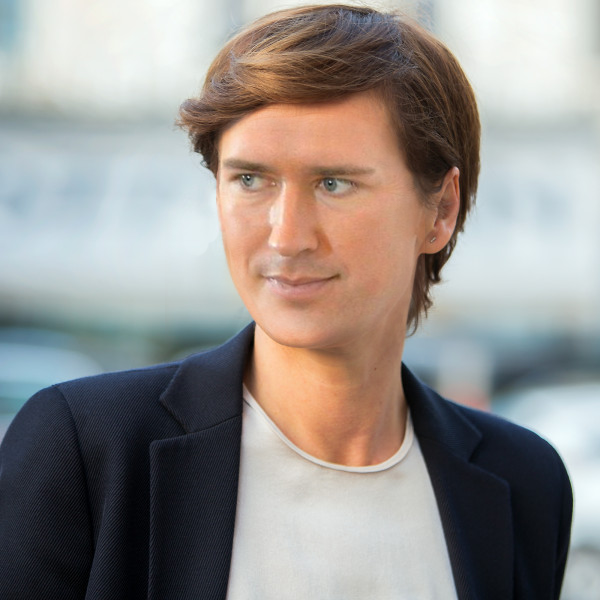
Deep Fakes with Sebastian Rendi Wagner
Not long ago the first videos started showing up, were you could see people saying things which they never said in reality.
This one really triggered goose bumps for me when I saw it first
Since then I was fascinated by the possibilities, but also of the dangers of this so called deep fakes.
Recently I stumbled upon this open source deep fake project on github, and therefore it was natural to try it out myself.
Baby Steps into the Deep Neural Network
In the beginning I was struggling quite a bit setting it up on Linux before switching to Windows, where there is a simple executable available,
which installs all dependencies! I did not expect it to be that comfortable.
The deep fakes work because you train a deep neural network (Thats where the name comes from) on two faces. During the training it adjusts weights and bias values for each neuron, so that the last layer lets you map one face on the facial expressions of the other image.
For this you need hundreds of images of the two persons in different lightning conditions and from different perspectives.
This made me choose politicians, since there is no shortage on images and videos of them.
Since it is a bit easier when the target and the source person look more alike, but much funnier if they don’t, I decided to map a male face onto a woman.
In this particular case I tried mapping the face of Sebastian Kurz, head of the Austrian ÖVP and previous chancellor, onto the face of his main opponent, Pamela Rendi-Wagner.
Funnily enough I found a great video where she talks specifically about overthrowing Sebastian.
Since the voice will stay unaltered, the immersion of this wont be to deep but its a fun start 🙂
The tool I found is extremely powerful and lets you extract faces from images or videos. Here I directly saw already the limitations of my 2015 700€ Notebook.
I had to choose very low batch sizes and force the neural net to do also some of the computation on the CPU. This made the training very very slow.
Here you can see the progress after the first iterations:

Target A is the unaltered image A>A maps Pamela onto her own facial expression, A>B maps Sebi on her head. On the right side you see the same the other way round. Since this was right in the beginning, you can see that the training starts with a random initialization and trains on one face at a time.


After around 10000 iterations and half a day of computation I became unpatient and decided to pause the training and check how the output would look like.

Unfortunately the viewer still needs a lot of imagination to see Sebastian in the video:

So therefore I continued the training and left to a cocktail bar to let the computer work in peace.
After getting up late on the next day and 35000 iterations I mapped the face again on the video and it looked only slightly better:

Sooo I kept my computer training even further. By now I came up with potential changes in the training settings to improve the results,
but I was already 20 hours into training and would need to start from scratch if I would apply the changes, so I first wanted to see the
final results with the current settings.
Only 30 hours more to go where I could not use my computer for any other thing. The good outcome of this was, that at least I cleaned my apartment very thoroughly and got time for some reading and other hobbies.
ML projects surprisingly turned out to be great digital detox experiences 😀

Dhe Next Network
The last version was tested after 47300 iterations and since it still was not really good, I started a new training, now with more different images from Sebi, some added options for better color balancing and a much bigger (but still tiny) batch size of 32.
Any bigger batch size and the program would not even start, because it would reach the limits of my graphic card.
This time is is already visible from the beginning, that the color matching is much better in the new version. But each iteration takes around 35% longer than before and the loss function converges much slower than in the first model.
Its much harder to tweak a model when every action you perform takes 20+hours to see the effect. Deep fakes is either for people who are very patient, have powerful computers or both of it^^


The blue parts in the bottom left of her face are due to the blue background in around 30% of the trainings images. I thought blue is actually a good contrast color for the NN to separate from skin tones, since blue screens are so effective, but I was wrong 😀
While the losses dropped just in a few iterations from 0.2 to 0.03, it took literally hundred thousands to reach 0.02

While I took 90% of my training data from just 2 videos per candidate, the deep fakes surprisingly always worked best on some of the other images with completely different lightning conditions. So maybe I simply took very sub-optimal source videos to start the training with

In the end a one minute gimp project (I stopped the time) looks much better than the output of 4700 minutes of training.
But here I was simply overlaying two images and ignoring her facial expression.

The final video looks most realistic when watched in 144p 😀
Maybe I will try it again in the future, utilizing more powerful computation power in the cloud. Then I will also put more effort in creating the right training set 🙂