River Table
If you have spent some time on the world wide web, you most probably have seen at least one rivertable. They look simply amazing and the natural beauty of fluid dynamics, frozen in time is simply astonishing. The output depends mostly on chaos, where only some input variables can be tweaked. This was love on first sight and I knew that I definitely have to build some of that on my own.
Since a dining table is to big as a beginner project and I am lacking the tools and the workshop, I decided to make a smaller sized table, with still enough space for two people to comfortably eat on it, which is still small enough to build it in my kitchen. (Stupid idea, I know… now xD)
So I bought a beautiful slab of oak, cut a rivershape through the middle and built a 800*400mm cast. Since the slab was not perfectly rectangular, I had plenty of space on the front for a epoxy edge and got rid of the bark on that side for better strength.

Since I have seen so many videos where the epoxy was leaking out of the form I got a little paranoid and screwed the sides with lots of screws to the base plate, used silicone over the gaps, and finished my anti leak procedure with a layer of duct tape. And I was right with my precaution!
The slab of oak was exactly the size of the base plate and I had to push it in with force, therefore widening the gap a little bit.
In below picture you see my mold from below. It is clearly visible where the duct tape was placed, and on the bottom right you see where it spilled out. But with all the obstacles in its way, the Epoxy blocked itself while drying and only a single droplet made it to the (covered) floor. Focus on the sealing of your mold, especially if you also pour the Epoxy on a side of the mold.

While pouring the epoxy I made two devastating observations:
- Since the front is not symmetrical, and the cast is only placed on a not so stable chair, the weight distribution started to tilt the cast to one side
- Since the epoxy edge design came as a surprise, I did not have enough epoxy to fill both rivers to the top

The first issue was quickly fixed with some weights and a level. The second issue even increased, when the epoxy started flowing below the oak, despite my efforts in clamping it down. So there was this huge height gap remaining:

No way I can sand this down that much!
After checking how the famous youtubers handle such issues, I decided that I have neither the space, nor the money for a professional planer. But there are also handheld planers, which are much more reasonable in price and size. But when researching the infinite knowledge of the world wide web, I only found discouragement for using them in combination with epoxy. People claimed that it will heat up the resin to much and will burn/destroy the surface as well as the planer.
So after having lots of fun, destroying the cast and breaking the table out of it, i started searching for the right planer.
I was lucky, finding the Bosch PHO 2000 as a deal for under 60€ at Amazon and decided to give it a try. Since it has a connection for the vacuum cleaner, I expected it to work in my kitchen, and I was honestly amazed how little dust came out, while chopping 2 mm at once away.

…for around 50 seconds, before the vacuum got stuck from to much wood and it started throwing chips against the opposite room wall o.0. So if you do not have a workshop graded vacuum cleaner, don’t bother trying it and just sweep it up afterwards.
But from manufacturing perspective, I was more than happy about the planer and it worked super fast, precise and left me with an already very smooth surface. It even has guides to create a mitre, which I happily did, since I originally planed to do with a jigsaw, which would have been much more work.

The main downside of taking so much wood away, was that I also took of most of the fillings.


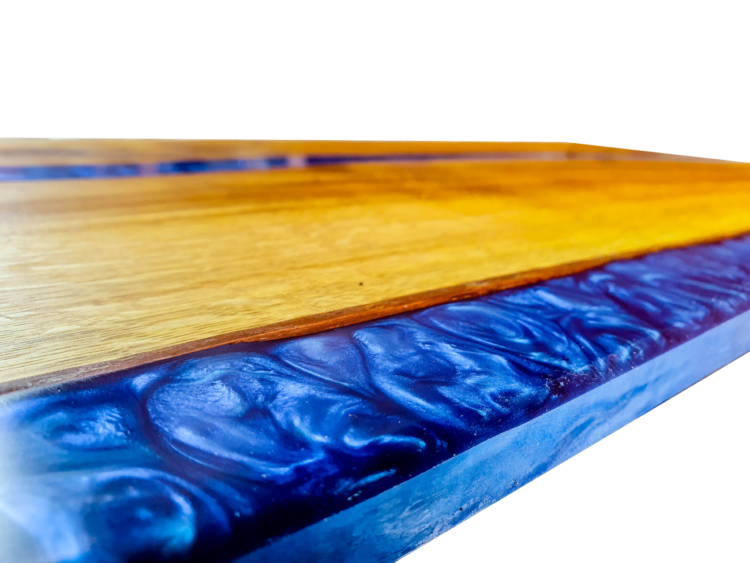
Finally I had a nice and smooth surface and this time I went out in the garden before grinding the table. I started with a 40 grid to grind the whole plate and increased the smoothness step by step. At 300 I starting wetting the epoxy and went up to 800. The epoxy still had a haze, but when wetted, it looked amazing. So I hoped oil will keep this effect forever, which it did:


This was a really amazing project where I had lots of fun and learned so much about woodworking! I really can recommend this to everybody to try it out yourself! You can do it, you don’t even need a workshop 😉
And since you went trough so much text, you deserve a video:

Btw the Amazon links are affiliate links 😉